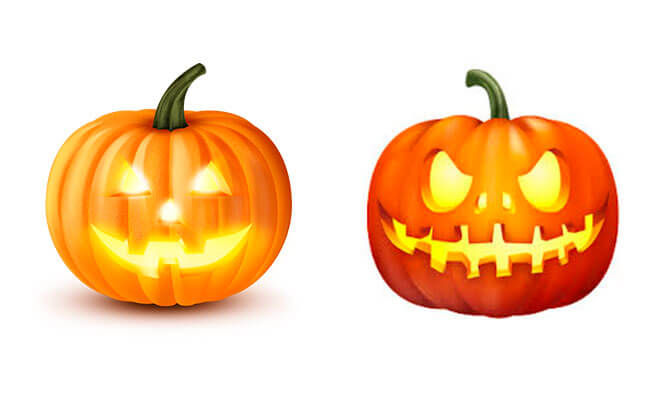
Halloween is almost here and we are preparing for the Halloween celebration with the step-by-step drawing tutorial on how to draw Jack-o'-lantern. In this drawing tutorial, we will draw 2 versions of Jack-o'-lantern pumpkins.
Below are the pictures of Halloween pumpkins we will be drawing.

First version of a happy Halloween Jack-o'-lantern pumpkin drawing.
For this version, we will draw a more common, happy Halloween Jack-o'-lantern pumpkin.
Step 1. Draw the oval for the Halloween pumpkin.
We draw the shape of a pot-bellied Halloween pumpkin.

Step 2. Outline the eyes and mouth of the Halloween pumpkin.
We draw a part of the stem, make a sketch of the height of the eyes and their location, draw them. Then we outline the nose and mouth for our Jack-o'-lantern pumpkin.

Step 3. Add volume to the carved eyes, nose, and mouth.
Our pumpkin is thick-skinned, so we need to show that by drawing perspective to create the linear illusion of depth.

Step 4. Draw the relief on the pumpkin surface.
We draw a relief, it is most convenient to draw a line in the middle, then at a certain distance from it, to the right and left, further from these lines we draw more.

Step 5. Finish the shape of the Halloween pumpkin.
We finish the shape of the pumpkin and erase all the auxiliary elements.

Step 6. Hatching the Halloween pumpkin.
We shade along the bends, the farther from the bend (line), the tone should become lighter.

Step 7. Continue shading the drawing of the Halloween pumpkin.
We make the bottom and top of the pumpkin dark, also on the sides we have a darker color compared to the general tone. We make smooth transitions of the shadows to show the unevenness of the form. We apply shadows to the bottom of the eyes, nose and mouth. The cavity inside the pumpkin is very, very lightly painted over.

Second version of a scary Halloween Jack-o'-lantern pumpkin drawing.
In this version, we will look at how to draw scary evil pumpkin for Halloween.
Step 1. Draw the oval for the Halloween pumpkin.
Sketch out the top and bottom, the shape of this pumpkin is like a rectangle with very rounded edges.

Step 2. Draw the scary eyes for our Halloween Jack-o'-lantern pumpkin.
First, draw the upper part of the eyes, then the lower.

Step 3. Outline the mouth for the Halloween pumpkin.
We connect into a single shape, then draw the nostrils and mouth to the ears.

Step 4. Draw the teeth for our scary Halloween pumpkin.
There are many teeth, it is more convenient to start drawing from the middle and go to the sides.

Step 5. Add volume to the carved eyes of our scary Jack-o'-lantern.
We finish the teeth, erase unnecessary lines, in the eyes and nostril we show the thickness of the crust.

Step 5. Add volume to the carved mouth of the Halloween pumpkin.
Also add perspective on the lower part of the jaw and on the top. Then we draw the upper and lower parts of the scary pumpkin.

Step 6. Shade the inner parts of the carved eyes and mouth of the pumpkin.
We shade the crust where it is cut out.

Step 7. Hatch the surface of the Halloween pumpkin
We hatch the whole surface of the Halloween pumpkin.

Step 8. Shading parts of the scary Halloween pumpkin.
Adding dark shades to our drawing of our scary Halloween Jack-o'-lantern.

Step 9. Finalizing the drawing of the scary Halloween pumpkin.
In the last step of our scary Halloween pumpkin drawing tutorial, we paint over the oral cavity and eyes leaving glare (in the mouth is not necessary) very lightly, barely pressing on the pencil. And the scary Halloween pumpkin drawing is ready.

Today you have mastered drawing a pumpkin for Halloween, compare the result, if necessary, correct it where necessary. To lighten, use an eraser, to darken - still apply lines.

Hope you liked our drawing tutorial! If you like our website, please also subscribe to our YouTube channel: https://www.youtube.com/@ImagiDraw

Comentários